For a long time I have been a Subversion(SVN) user, but a few months back (or is it a year) I heard about this new fangled VCS with a D in front, called Git. After a few chuckles about the name, I was curious to see how, and why it is supposedly better than SVN.
First thing I needed to understand is that Git is a DVCS. D stands for distributed (or disturbed in case Git does not even remotely sit right with you), shortest explanation of that means that there is no classic server/client relationship, and that every user has a full copy of a repository (history and all), freaky I know. Not only that, Git supposedly handled branching much better than SVN, because:
-
it’s done locally, so it’s fast and cheap
-
tracks changes differently, and has more info available to make a better decision when merging branches
Anyone using SVN for longer periods of time encountered the problem of merging branches, when after a lot of coding and commiting, SVN decides to completely bork the merge process and you end up doing it manually, usually with a lot of hair pulling, and unnecessary aggravation.
After a few months of using Git for my personal projects, and using it on two smaller contracts, I can say that in 90% of cases those two points above hold true, and those 10% are usually almost stress free (and probably my own mess to begin with).
What clinched the deal for me was the realisation that I can go completelly disconnected, while still having full history of the project, and that I can branch/merge as often or as little as I needed, and only when I am completely satisfied with the changes, I can push it to the main repository.
Second thing I needed to understand is that Git is intended for linux (or any other *nix derivative), and that native windows version is so far on the backlog that we can say there is none.
Luckily there are few options available for windows:
-
to setup Git via Cygwin, which as you may or may not know is linux-like environment for windows (meaning whole lot of typing in console/prompt, zero to none GUI’s) and is considered the “official” way of running Git on windows
-
to setup Git via msysgit project which is a fork of Git project created as an effort to make a native windows version.
Anyway you put it, daily Git usage will require you to type commands in console/prompt, yes there are GUI tools like TortoiseGit, Git Extensions for VS etc, but sooner or later, you will be prompted to type, deal with it, the sooner the better.
If asked, for everyday windows usage I would recommend the msysgit, it’s simple to setup, unobtrusive and quick.
There is a plethora of guides on msysgit setup and usage, google is your friend, but here are a few:
That should get you up and running with Git if you want to run it locally, or in conjunction with GitHub (or other similar sites), but what to do if you want to run your own git server locally, with user privileges and all?
I started looking and two options appeared in searches, one is GitWeb and other is Gitosis, there maybe more, but after reading up on Gitosis I knew this one is right for me.
It manages multiple repositories under one user account, using SSH keys to identify users. However, users do not need shell accounts on the server, instead they will talk to one shared account that does not allow arbitrary commands. Git itself is used to setup gitosis and manage the Git repos, which pleases the recursion-seeking orthogonal CS-side of my brain.– from scie.nti.st article
There was only one snag, Gitosis runs best on linux (or I thought so at the time) so I setup an ubuntu VM and setup all the requirements, git, ssh and gitosis as described by an article on scie.nti.st(the interesting part about Gitosis starts with the “Creating new repositories” section, you should definitely read it) and this setup was working out nice for me, git(pardon the pun) connected to office machine via VPN, the VM is running, do the push/pull dance, and git out.
Nagging feeling at the back of my mind was telling me that I should find some way to setup Git on windows host, but I kept delaying it due to my workload and obligations, then one day the sky opened and a lightning bolt struck, the power went out while I was not in the office, the machine shut down, and when the power was restored and machine booted, the vm has not. That caused some friction in my operations that day, and I said enough, there HAS to be a way of using Gitosis on windows.
This post is a scratch of the itch that resulted from the situation above.
Setup
We are going to dive deep into console country here, so be prepared for a lot of command typing.
In the text I will use LMB for Left Mouse Button, and RMB for Right Mouse Button.
Consider this, the location of the git repositories will be in your Cygwin folder under the user you choose to run git, so if you have more than one partition, and use a separate partition for data, take notice and select the install location appropriately.
I will assume that you have git running on one of your machines, and that you want to setup the gitosis server on another.
With that said, lets git a move on.
First thing you need is Cygwin, you can download it from here. It is a nice little setup app, that requires internet connection to pull down all the selected packages, it’s pretty straightforward to setup.
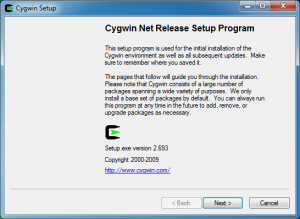
- Download the setup and run it, click next,
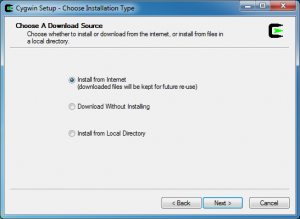
- Select the “Install from internet” option, click next,
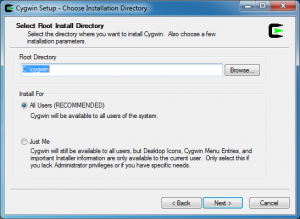
- Select your installation folder, and select install for ALL USERS, important thing to do in order to get the ssh daemon running properly, click next,
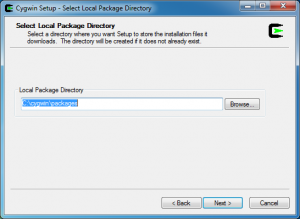
- Pick the location to store the downloaded packages, I used cygwin_install_folder/packages, click next,
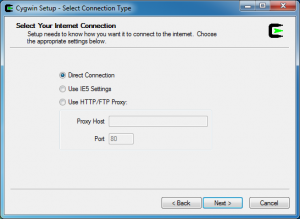
- Select “Direct Connection”, click next, it will download a list of mirrors
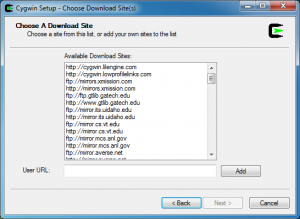
- Select a mirror, this is a tricky one, sometimes they are abysmally slow, I suggest using some university mirror, click next, it will download a list of packages, and you may be prompted with a warning, if this is your first time installing cygwin on that machine, you can ignore it
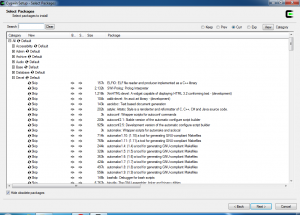
- Next up, a tricky one, package selector, you will be presented with a list, when you open a category, a list will show, the first column that says skip, is the one of interest to us. When you click on the skip, it will switch to the latest version of the package, further clicks will cycle it to a few older versions than to skip again
select the following:
-
git in the devel category
-
openssh in the net category
-
python in the Python category, important: note the python version number, you will need it for later
That’s what is required for gitosis setup, in case you need/want something else, feel free to choose what may apply to you. You can always come back, rerun the setup and get the packages you want.
Once done, click next, and enjoy the progress bar show, don’t worry if you see more stuff being downloaded than you selected, cygwin will also download and install the dependencies for the packages you selected.
When the download is complete, you can create icons on desktop and/or start menu (I will assume you put the icon on the desktop), and click Finish.
With that Cygwin has been installed, now on to the ssh configuration.
First off, fire up the Cygwin console with admin privileges.
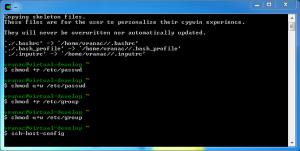
Before setting up the sshd, some directory permissions need to be adjusted within cygwin environment, based on this article, type or copy/paste the following in the console window. Each line is a separate command
|
|
That should take care of the permissions problem.
Let’s setup the ssh daemon, in the console type
|
|
You will be prompted with a lot of information, and all will go well if you are in admin privileges console, you need to answer questions by manually entering yes when prompted. The questions are:
|
|
When asked for
1
*** Query: Enter the value of CYGWIN for the daemon: []
When you see:
|
|
Answer no
|
|
You will then be asked to enter a cyg_server account password and that is it. You are done with cygwin ssh daemon setup.
Next up is setting up the windows firewall inbound rule (I am using plain vanilla windows 7 and it’s firewall, so YMMV)
-
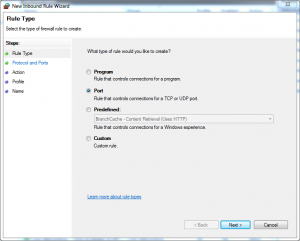
Go to Start Menu -> Control Panel -> System And Security -> Windows Firewall -> Advanced Settings (from sidebar) -> click on Inbound Rules -> New Rule (from right sidebar).
-
Select Port from options, click next.
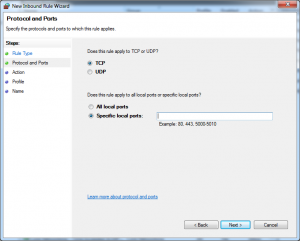
- Select TCP from options, enter 22 in specific ports textbox, click next.
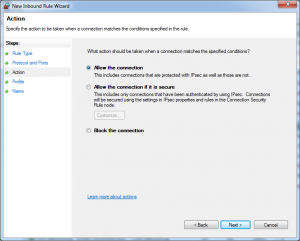
- Select Allow Connection, click next.
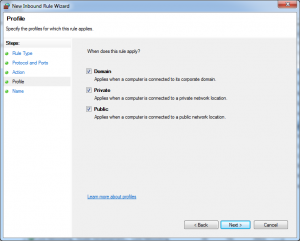
- Select Domain, Public, Private, click next.
- Enter a name for the rule (i chose SSH), click finish.
Fire up the sshd service by typing in the cygwin console window (with admin privileges of course):
|
|
If the setup went good, you should get a message that Cygwin service is started. Let’s test the ssh, type:
|
|
If will spit out a lot of debug text, and it will pause the script when you need to enter the password (your windows account one) to procees. At the end you should end up with username@machine~ in the console, this means you connected over ssh, now type exit, and it will spit out some more debug info, and it’s done.
You should now have a ssh server up and running.
Next stop gitosis…
In order to install gitosis you need python, you have that covered with cygwin setup, but you also need a python setup tools, and to make things more interesting, the setup tools need to match the version of the python you have installed (remember that I said to take notice of the python version). Unfortunatelly if on some days you have attention span of a fruit fly, like me, you can also type
|
|
Note the capital V, the console is case sensitive. The console will write out the version, in my case it is Python 2.5.5. To save yourself some trouble, change the permissions so all the users can read python directory by entering
|
|
Armed with that information, you can go to Python Package Index page, scroll down to the bottom of the page and download the appropriate package from the table.
For Python 2.5.5. you want setuptools-0.6c11-py2.5.egg, RMB click it, and select “Save As” because some browsers try to interpret the .egg files as text.
Once the file is downloaded to your machine, copy/move it somewhere easily accessible (either C: drive, or go to cygwin_install_folder/home/your_user_name, I will assume the latter). Type the following in the console
|
|
to execute the script.
Alternativelly if you put the file on c: drive for example the command would be
|
|
The script will run it’s course, and if you get the message similar to this, your setup was a success
|
|
Sooo… the python setup tools are, well, setup, time to get the gitosis and flex the git muscles a bit. The gitosis is obtained by cloning it’s git repository, here is how to do it, type the following in the console:
|
|
When the clone is complete type the following into console to setup gitosis:
|
|
There will be quite a bit of text outputted to the console window, if the end looks similar to this, then the setup was a success
|
|
If you arrived to this point without problems, that means that the setup part is done, and now…
Configuration
First thing you need to do is to setup the git user on Windows 7 via control panel, make him a standard user, and setup the password as you like.
Then you need to enable this user for the cygwin, do that by typing the following in the console (with admin privileges):
|
|
At this point you need a public SSH key, if you do not have one, you can generate it from cygwin by typing ssh-keygen, or you can check the GitHub guide for ssh keys.
Once you have your public SSH key (usually called id_rsa.pub) copy it to your cygwin’s /tmp folder (that would be cygwin_install_folder\tmp), then in the console type:
|
|
From this point on, you will be dealing with two cygwin consoles, one is the one you used so far, and the other one is the one that you will open now for the git user. To start a cygwin console for the git user, you need to Shift+RMB click on the cygwin icon on desktop, and select “Run as different user” or you can use runas /user:git C:/cygwin/cygwin.bat from start menu/or run program window (win+r).
Once the console is open you should see something along the lines of git@name_of_your_machine. Type the following in the console
|
|
That will initialize the gitosis, and the output of the command should be:
|
|
Switch to the console with Administrator privileges, and run the following command:
|
|
That will make sure that everyone has permissions to the post-update hook that gitosis provides.
Boys and girls, guess what? We are done.
Usage
Now that the Gitosis is setup, we can start using it from other machines that have your ssh key setup.
Coolest thing about gitosis is that you manage your repositories via a repository. You obtain the gitosis administration repository by typing the following in your git bash shell (assuming you are using msysgit)
|
|
If you are connecting for the first time to your gitosis machine, you will be asked to add it’s RSA fingerprint permanently to your list of known hosts. The output should look similar to this:
|
|
With this command done, you will have a new folder called gitosis-admin and in it you will have:
-
.git folder
-
keydir folder - this is where you will be adding additional SSH keys for other members of your team, or people whom you want to give access to repositories
-
gitosis.conf file - a text file in which you will be setting up your repositories and controlling the access
Let’s say you want to create a new repository called test. I will assume that you did the initial clone of the repository. Open the gitosis.conf file and add the following lines
|
|
OK, now that the repository is defined, we need to push the changes back to the gitosis server so it can finalize the setup. You can do that from your git shell opened in the repo folder by typing:
|
|
And the result will be a list of changes in your local repo, it will look something along the lines of this:
|
|
So now you know that gitosis.conf has been changes, it needs to be commited into the local repo, you do that by typing
|
|
The git will return result similar to this:
|
|
Note the part with single quotes, that is your commit comment. After this command has been executed, the repository is up-to-date, and the changes can be sent to the gitosis server. That can be done by typing:
|
|
The result will be similar to this:
|
|
With that your new repository is ready to be used. Note that you can’t clone an empty repository.
The proper way to do it, is to do a create a new folder on your drive, do a
1
git init
1
git remote add origin git@your-server:your-repo-name.git
Then make a few changes, commit them locally, and then do
1
git push origin master
For more info on proper git and gitosis usage please refer to the links i wrote at the beginning of the article.
