Last few weeks I have been working with DataGrip, a latest offering from JetBrains that is marketed as “Your Swiss Army Knife for Databases and SQL” and in my use case it most certainly turned to be true.
I needed to connect to Amazon Redshift, for those of you who do not know, Redshift is what happened when Amazon took a PostgreSQL 8.0.2 and mutated it into “Amazon Redshift is a fast, fully managed, petabyte-scale data warehouse service that makes it simple and cost-effective to efficiently analyze all your data using your existing business intelligence tools”, yet it does not support indexes afaik, and has a rather lengthy list of unsupported functions etc. Apart from that, it is really a joy to work with.
But I digress, as mentioned, Redshift is almost like PostgreSQL, but not really, so the driver present in DataGrip will not work… What could be done… Well, you can do the following:
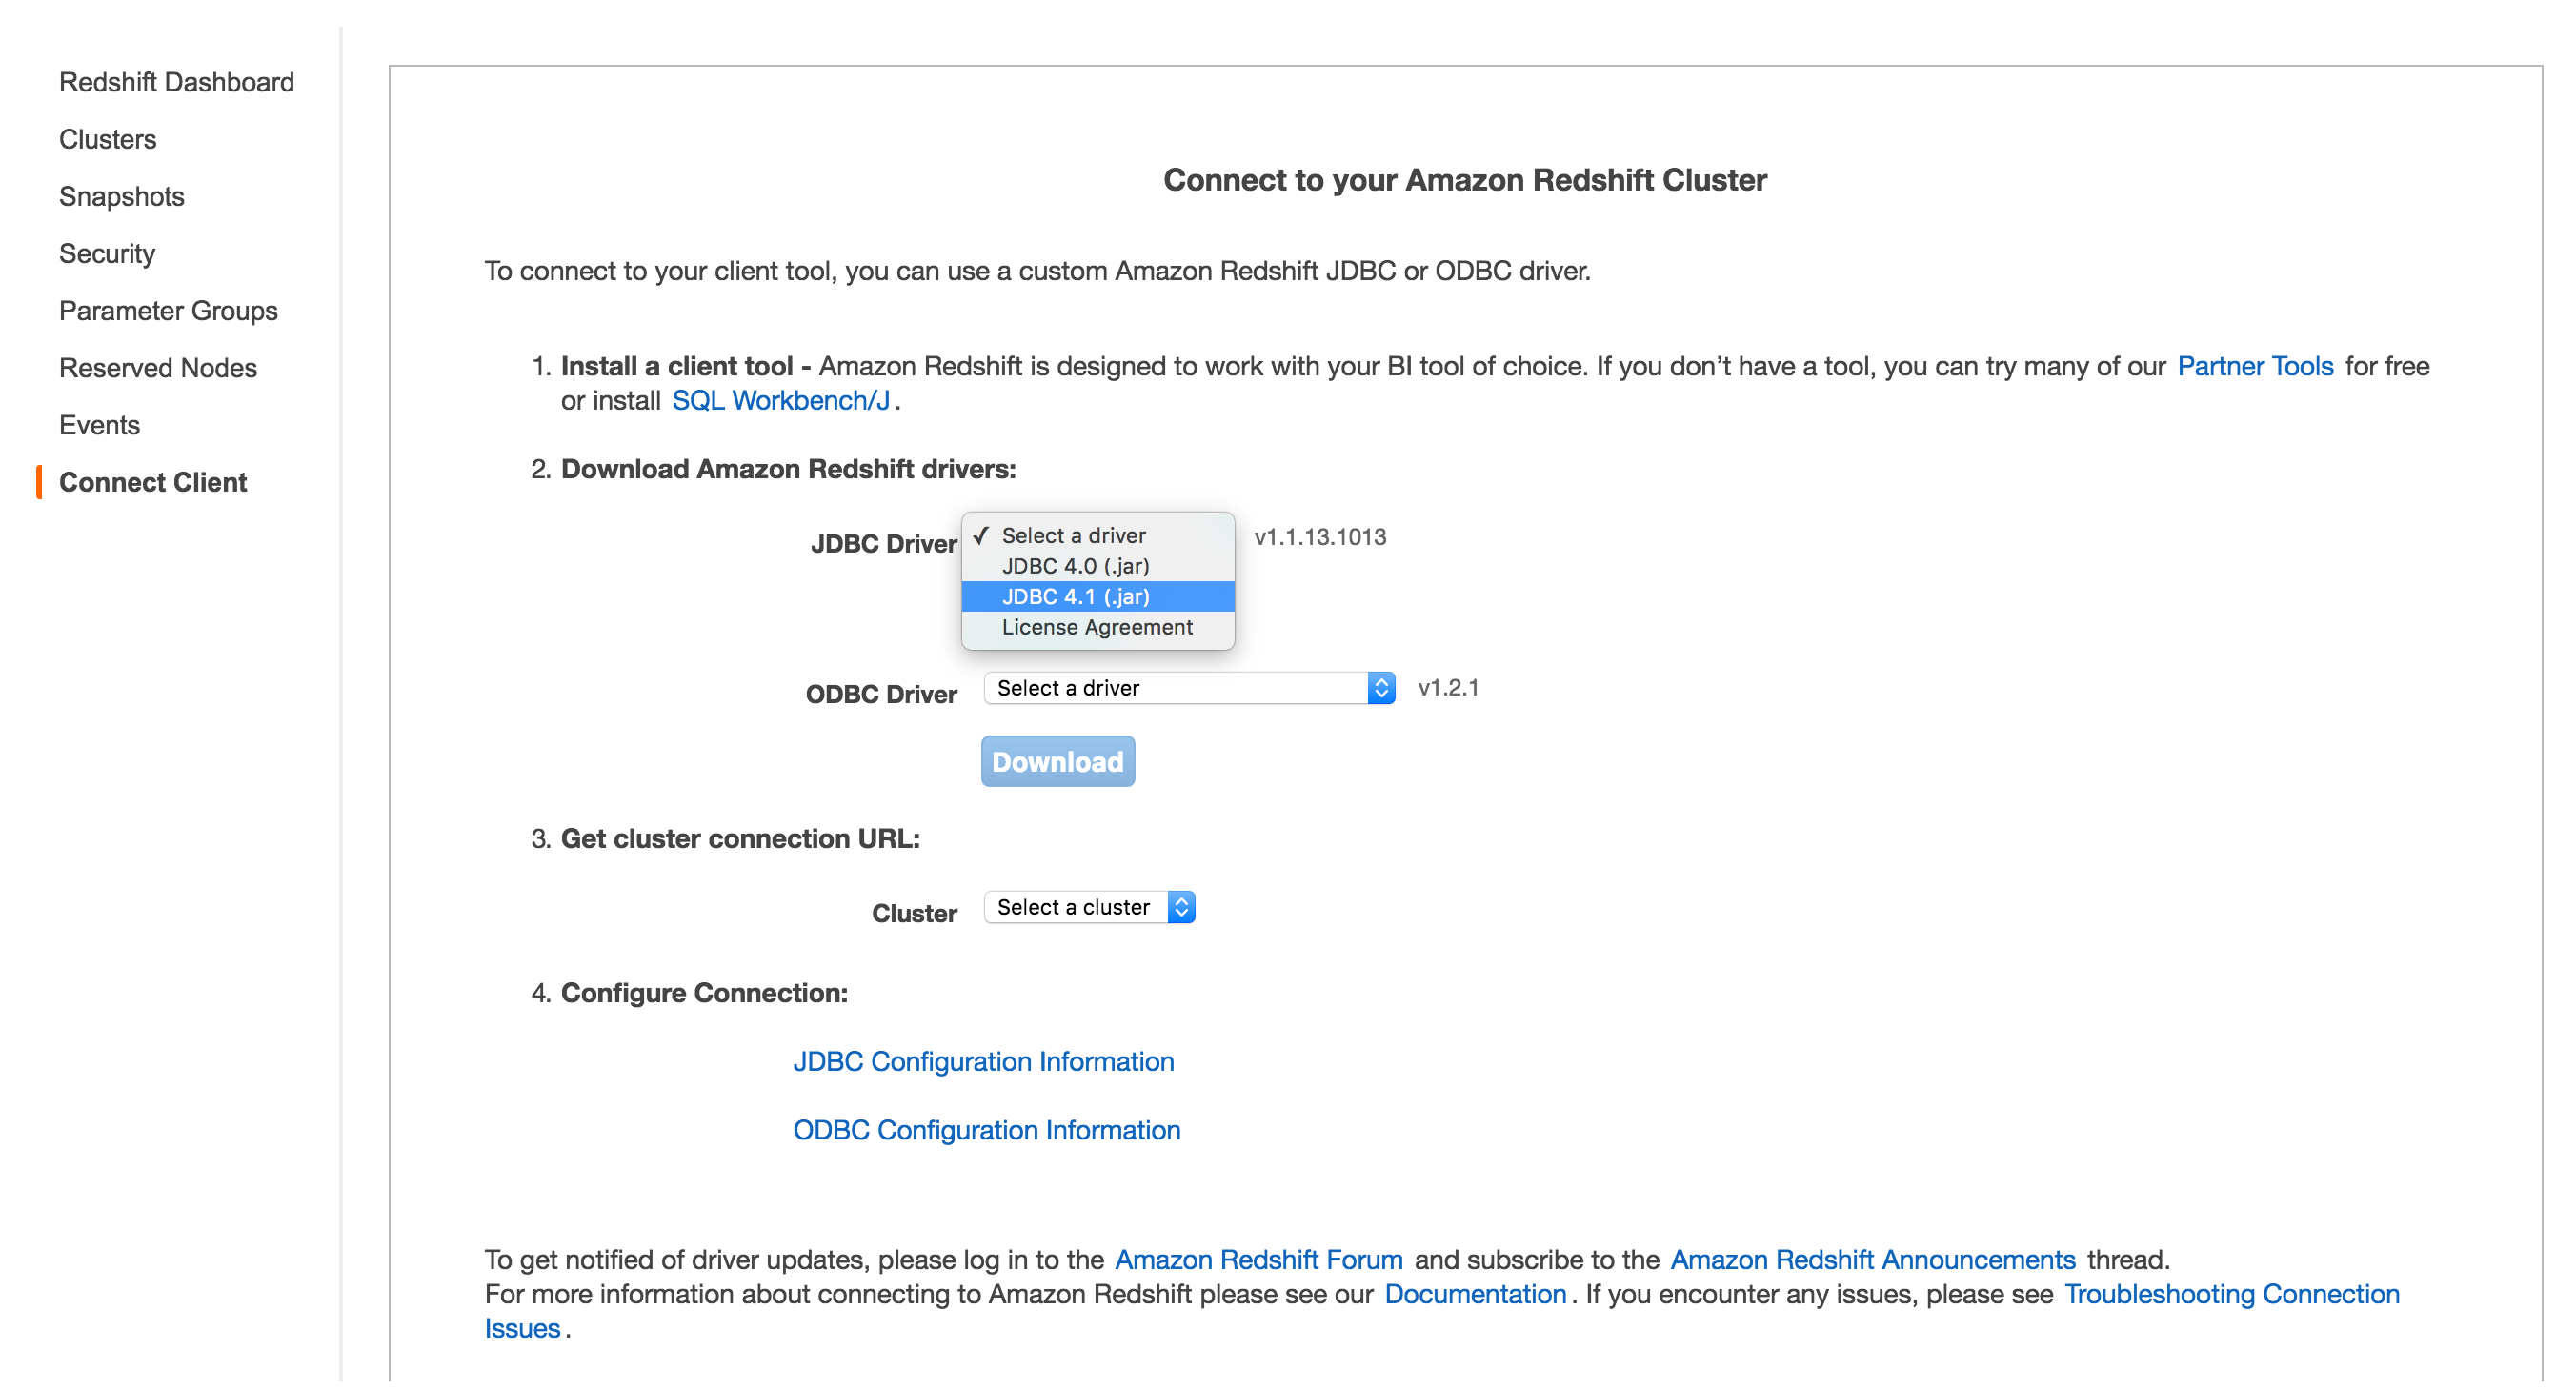
- you need to login to the Amazon AWS console
- go to the Redshift Dashboard, and then
- select the Connect client from the side bar menu
- select JDBC 4.1 from the dropdown and
- click the nice friendly blue “Download” button
[ ]
(/images/2016-05-14-connect-datagrip-to-redshift/get-the-driver.png)
]
(/images/2016-05-14-connect-datagrip-to-redshift/get-the-driver.png)
This will result in a jar file being downloaded to your machine.
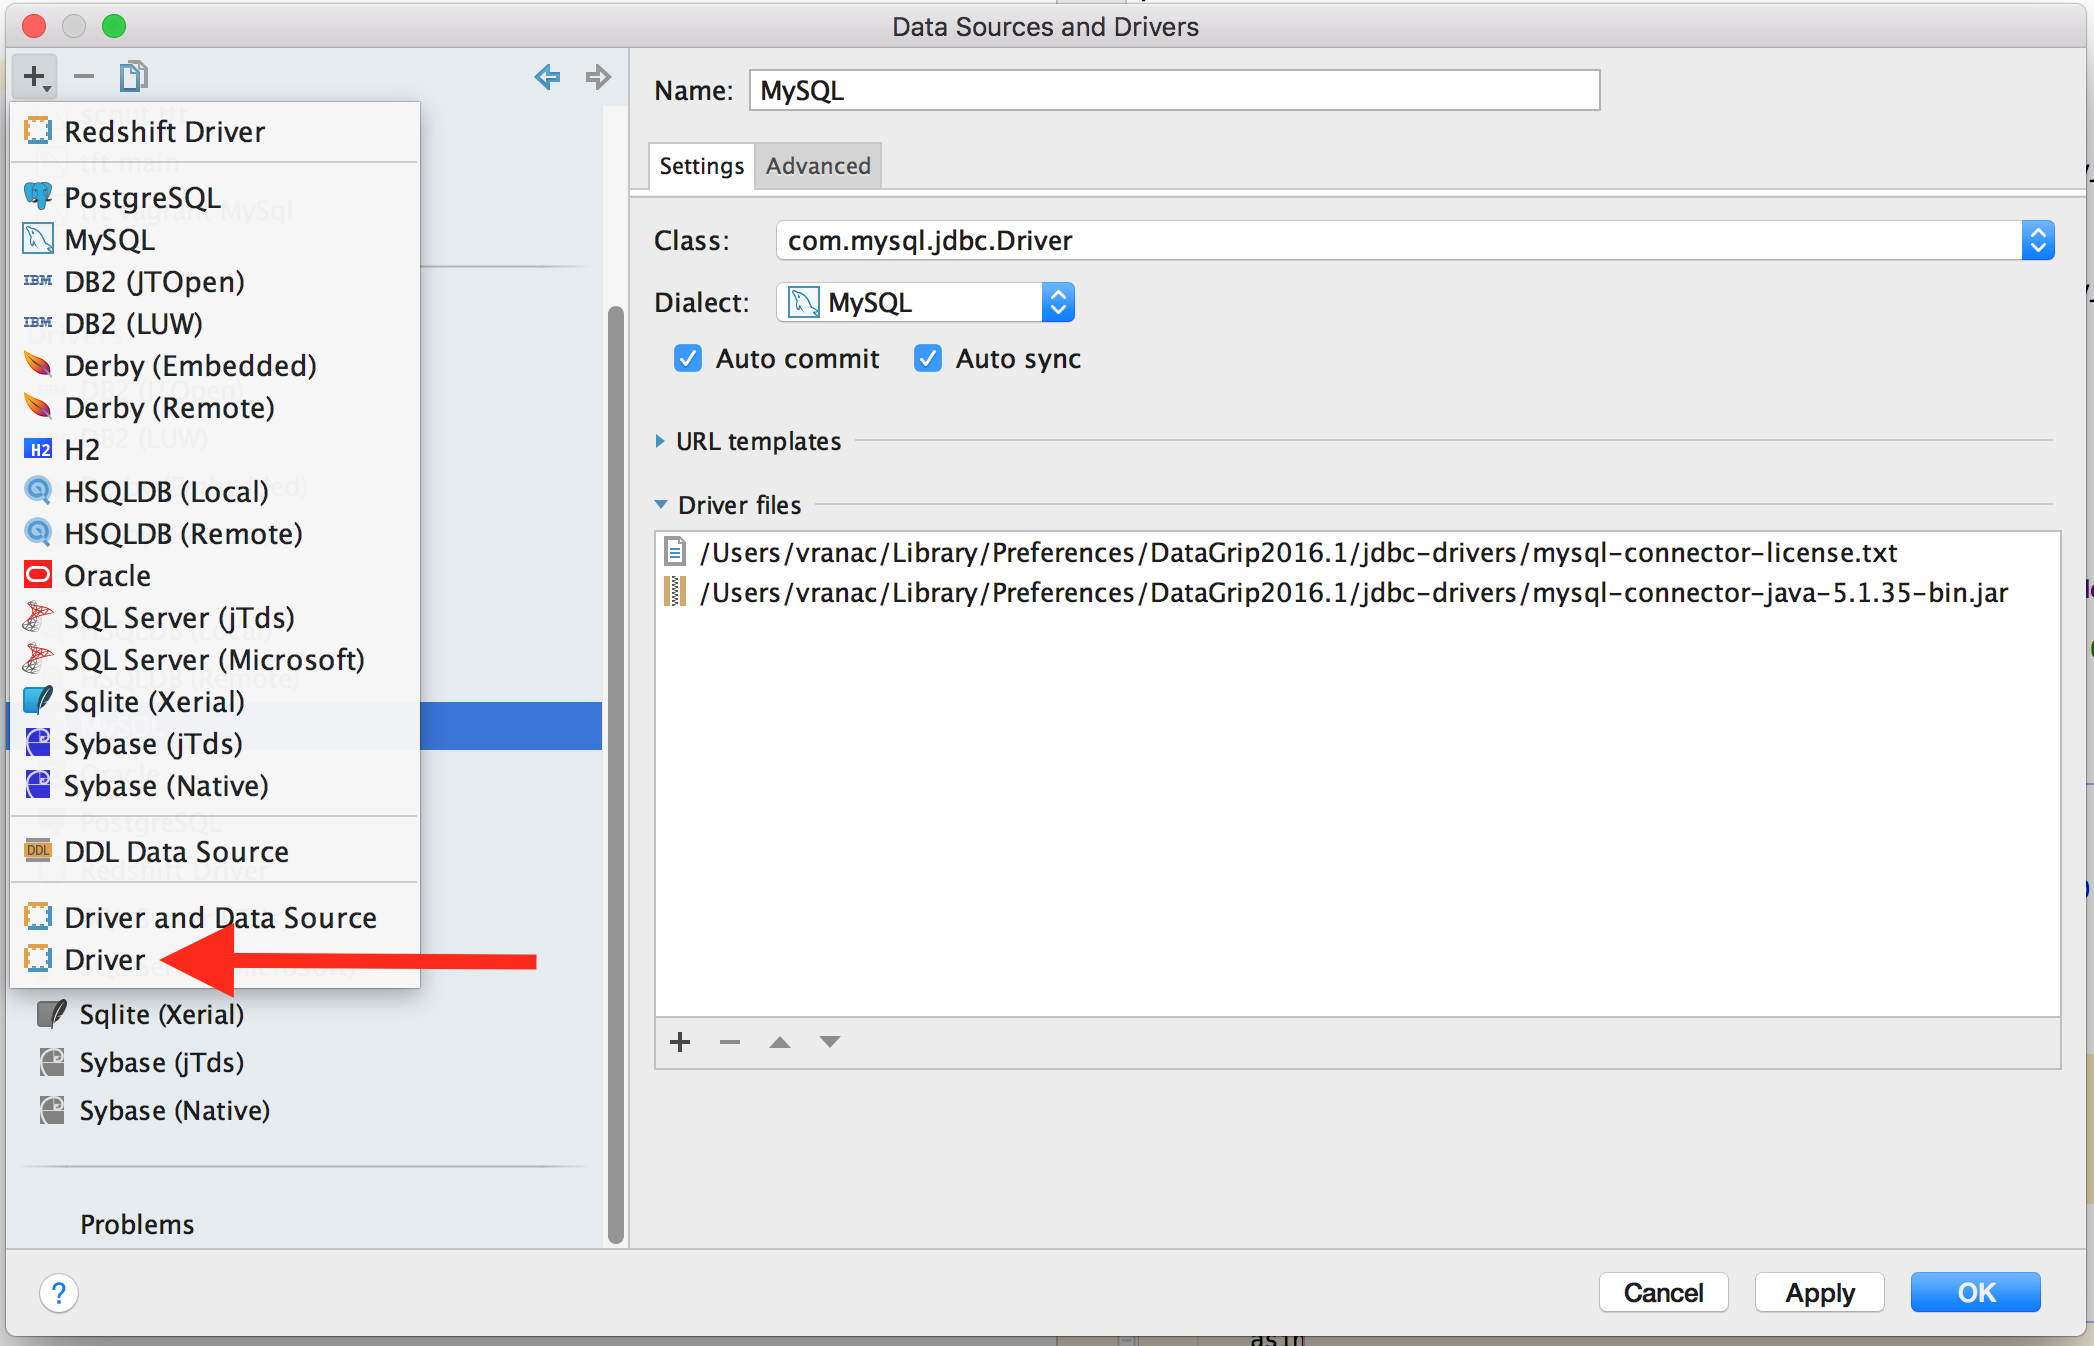
Once the jar has been downloaded, start DataGrip, if the “Data Sources and Drivers” window does not open on startup, you can get to it by going to File menu and then selecting Data Sources item
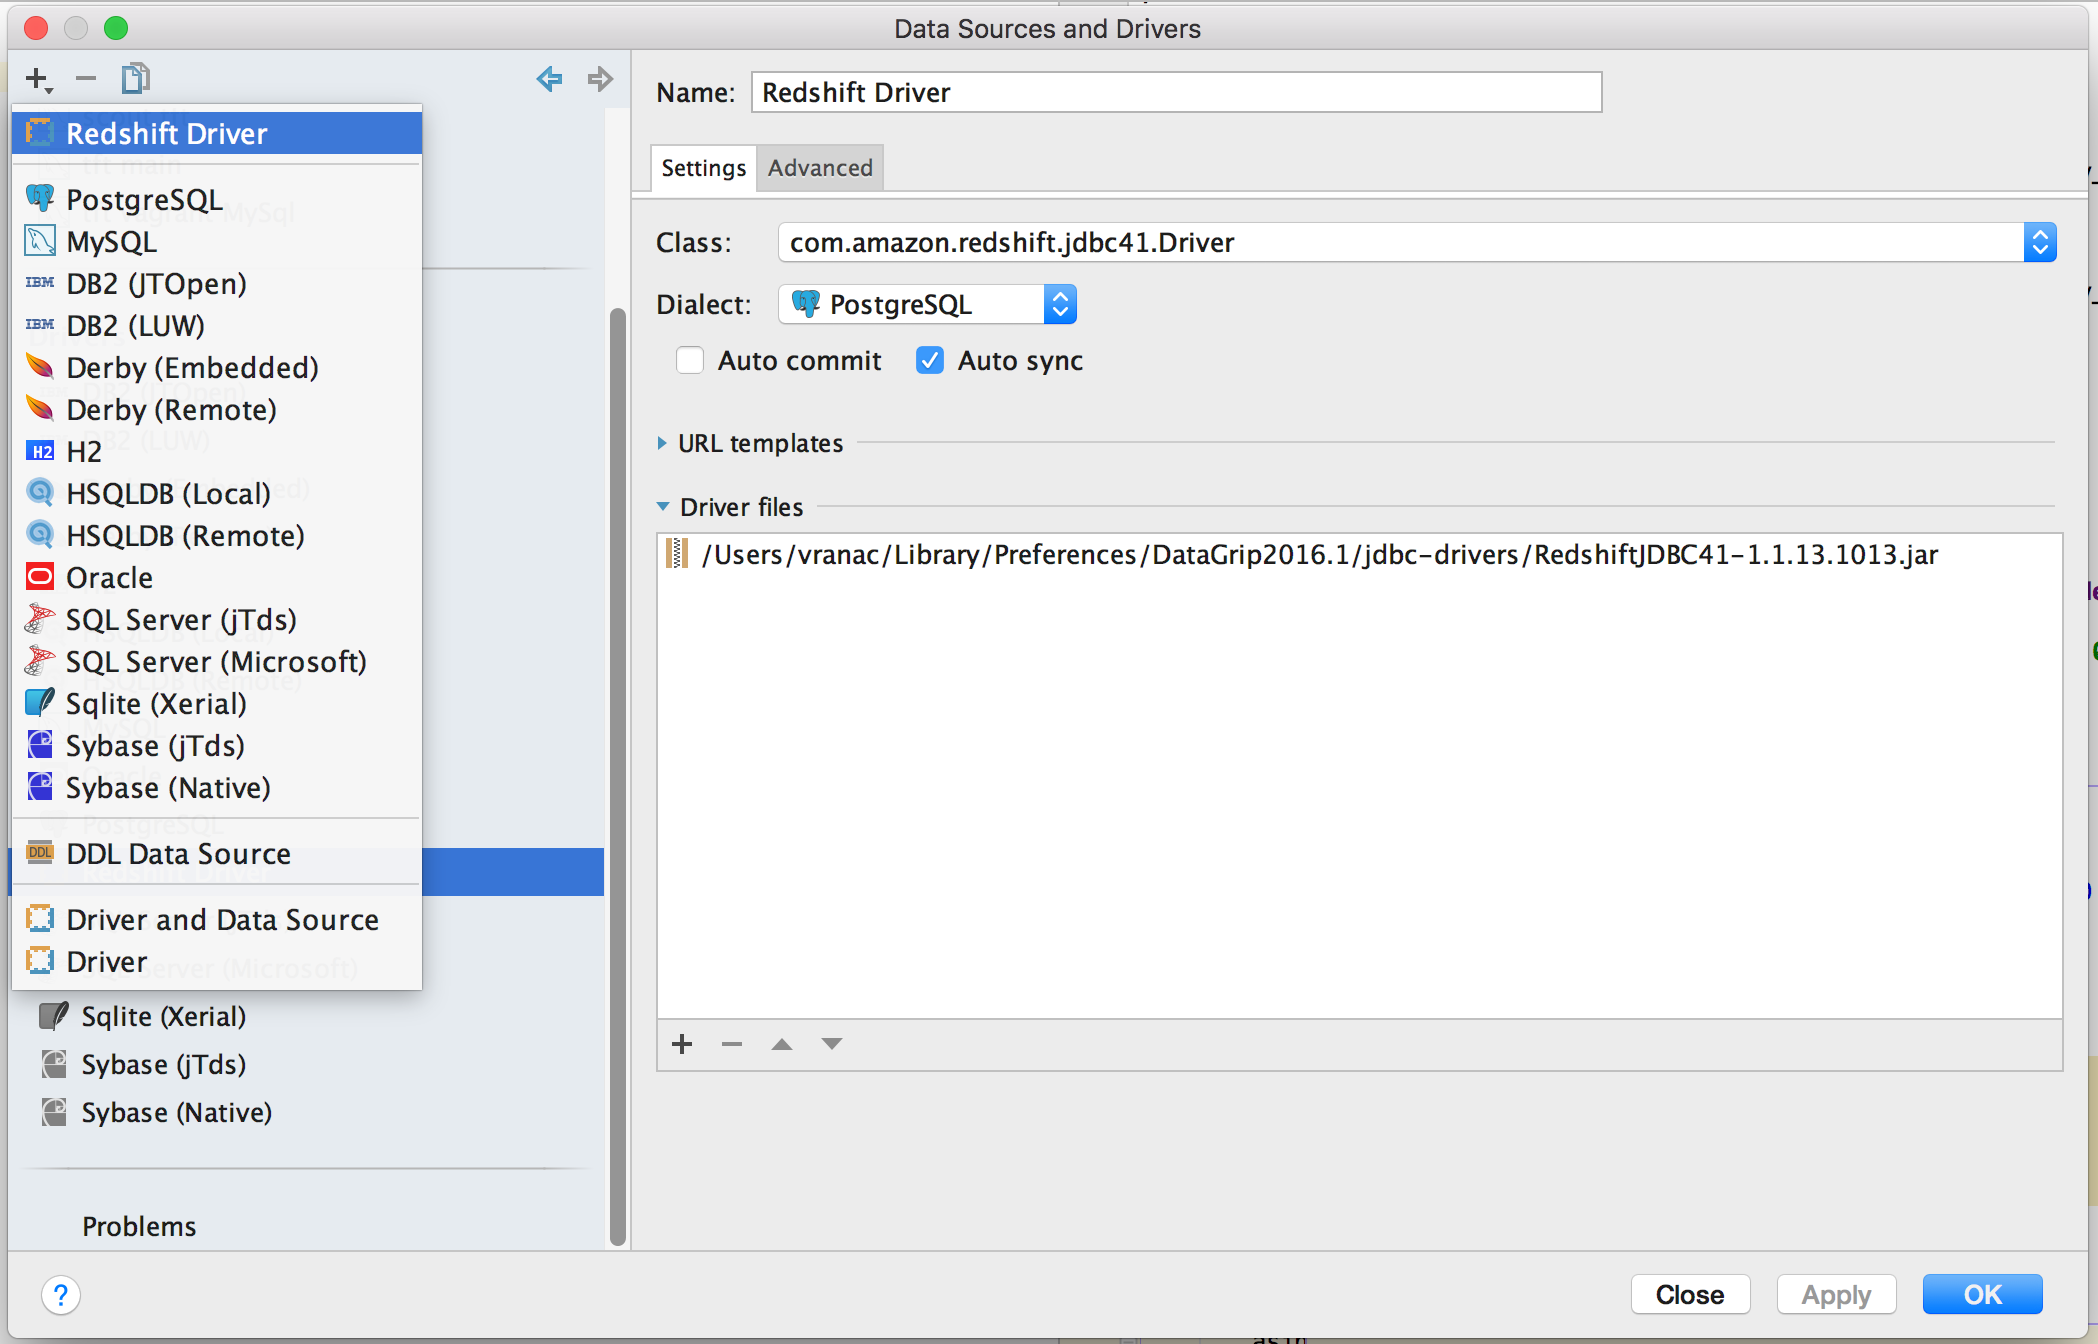
When the window opens, click on the “+” icon in the top right corner and select Driver
[ ]
(/images/2016-05-14-connect-datagrip-to-redshift/data-sources-and-drivers.png)
]
(/images/2016-05-14-connect-datagrip-to-redshift/data-sources-and-drivers.png)
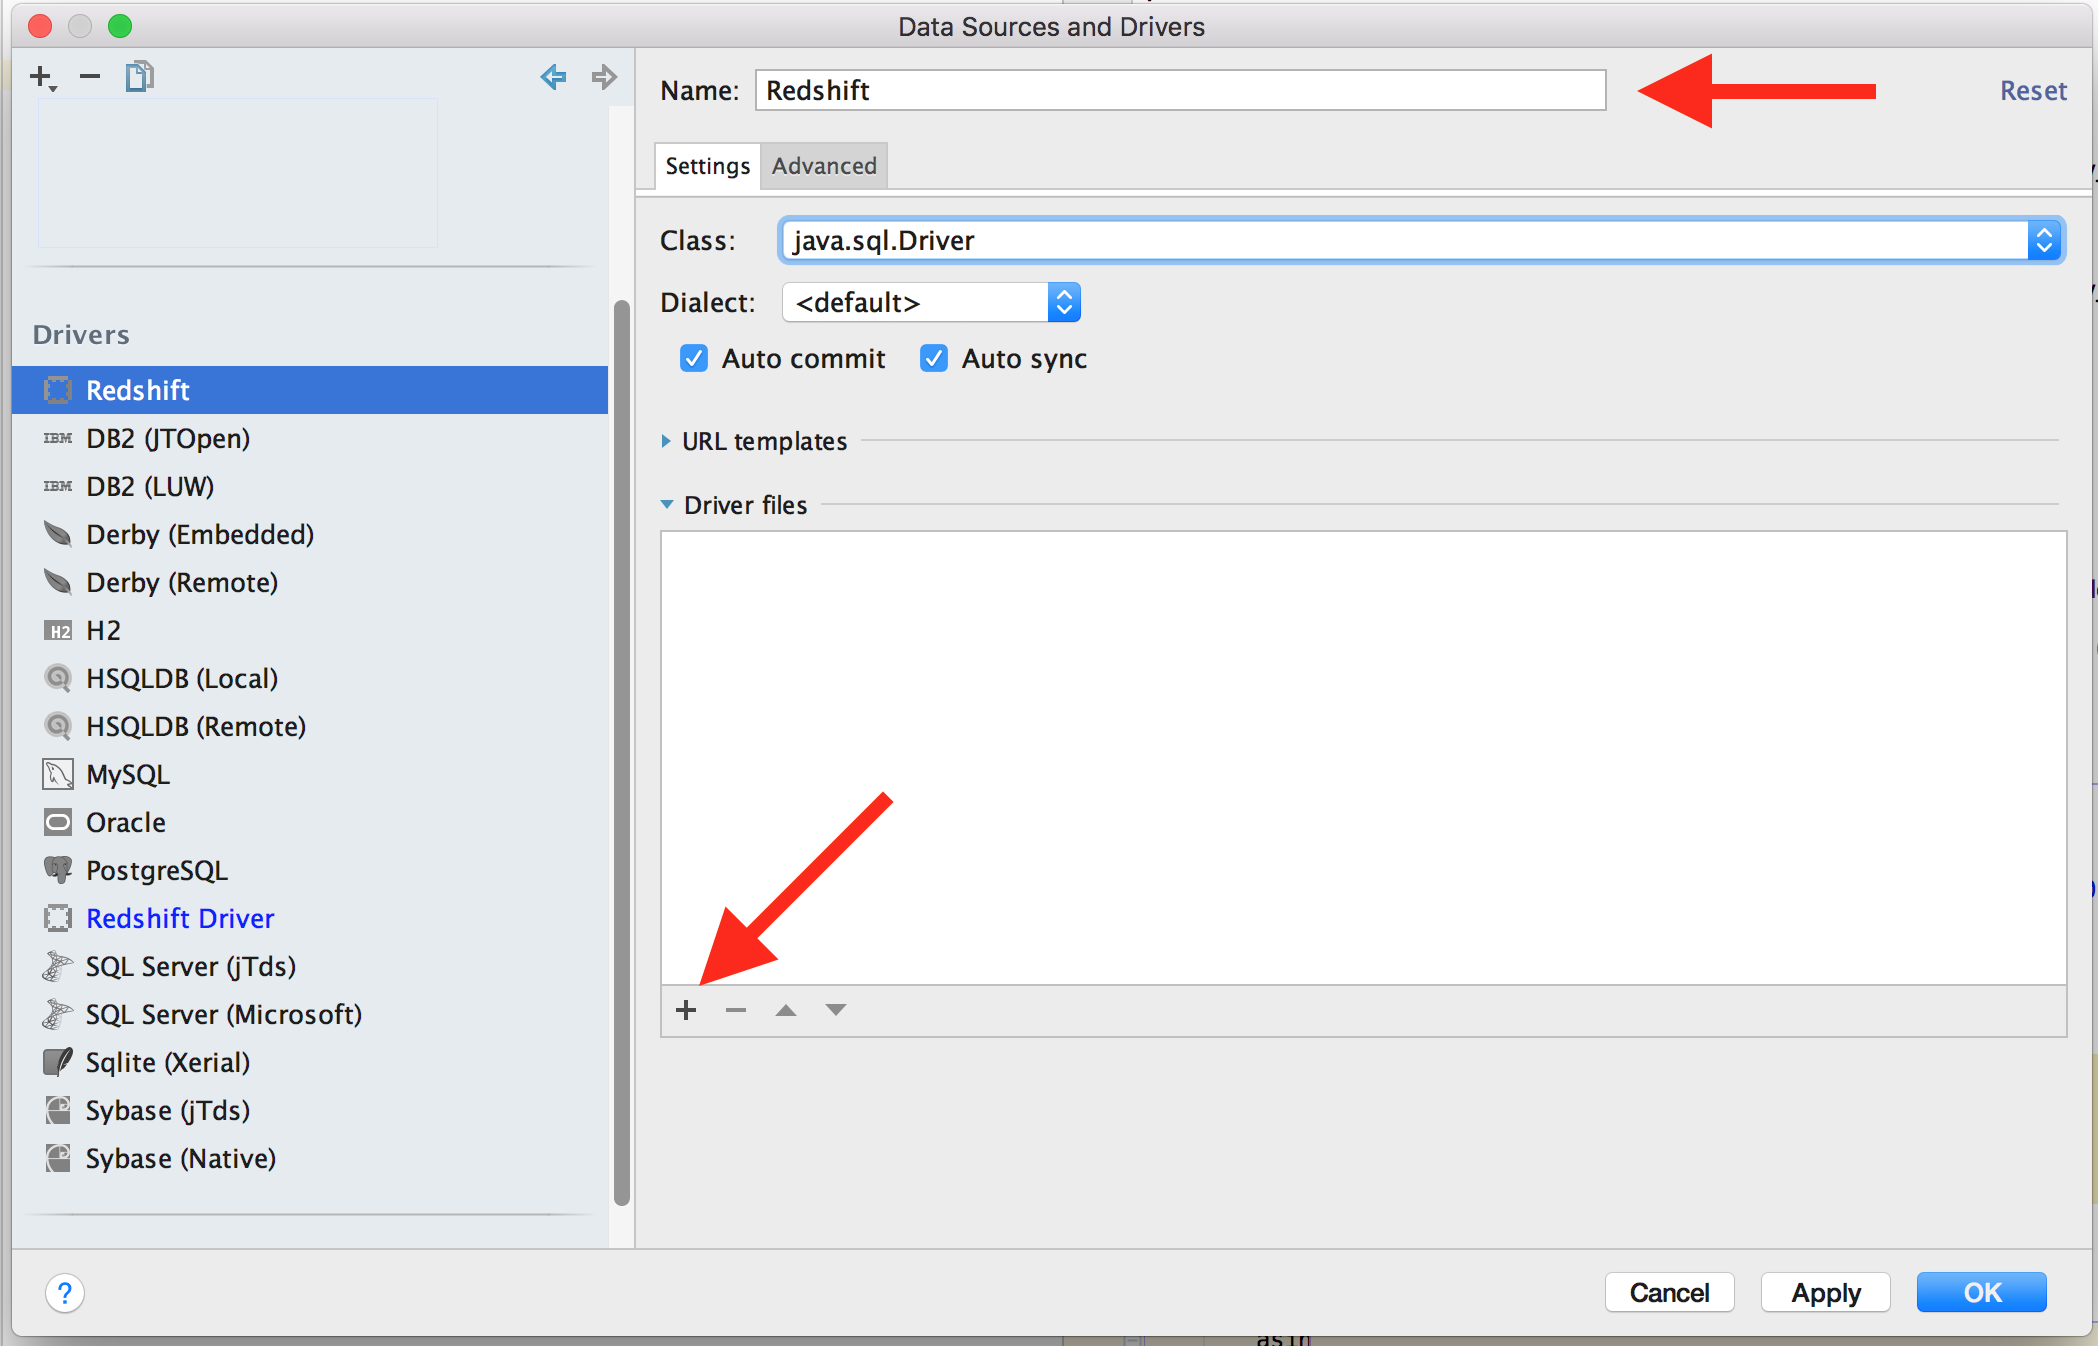
Set the name, and then click on the “+” icon in the main pane, you will get a nice
dialog to select the location of your downloaded jar files.
I opted to put them into the DataGrip jdbc drivers directory located at
~/Library/Preferences/DataGrip2016.1/jdbc-drivers, but YMMV as usual.
[ ]
(/images/2016-05-14-connect-datagrip-to-redshift/name-names-add-drivers.png)
]
(/images/2016-05-14-connect-datagrip-to-redshift/name-names-add-drivers.png)
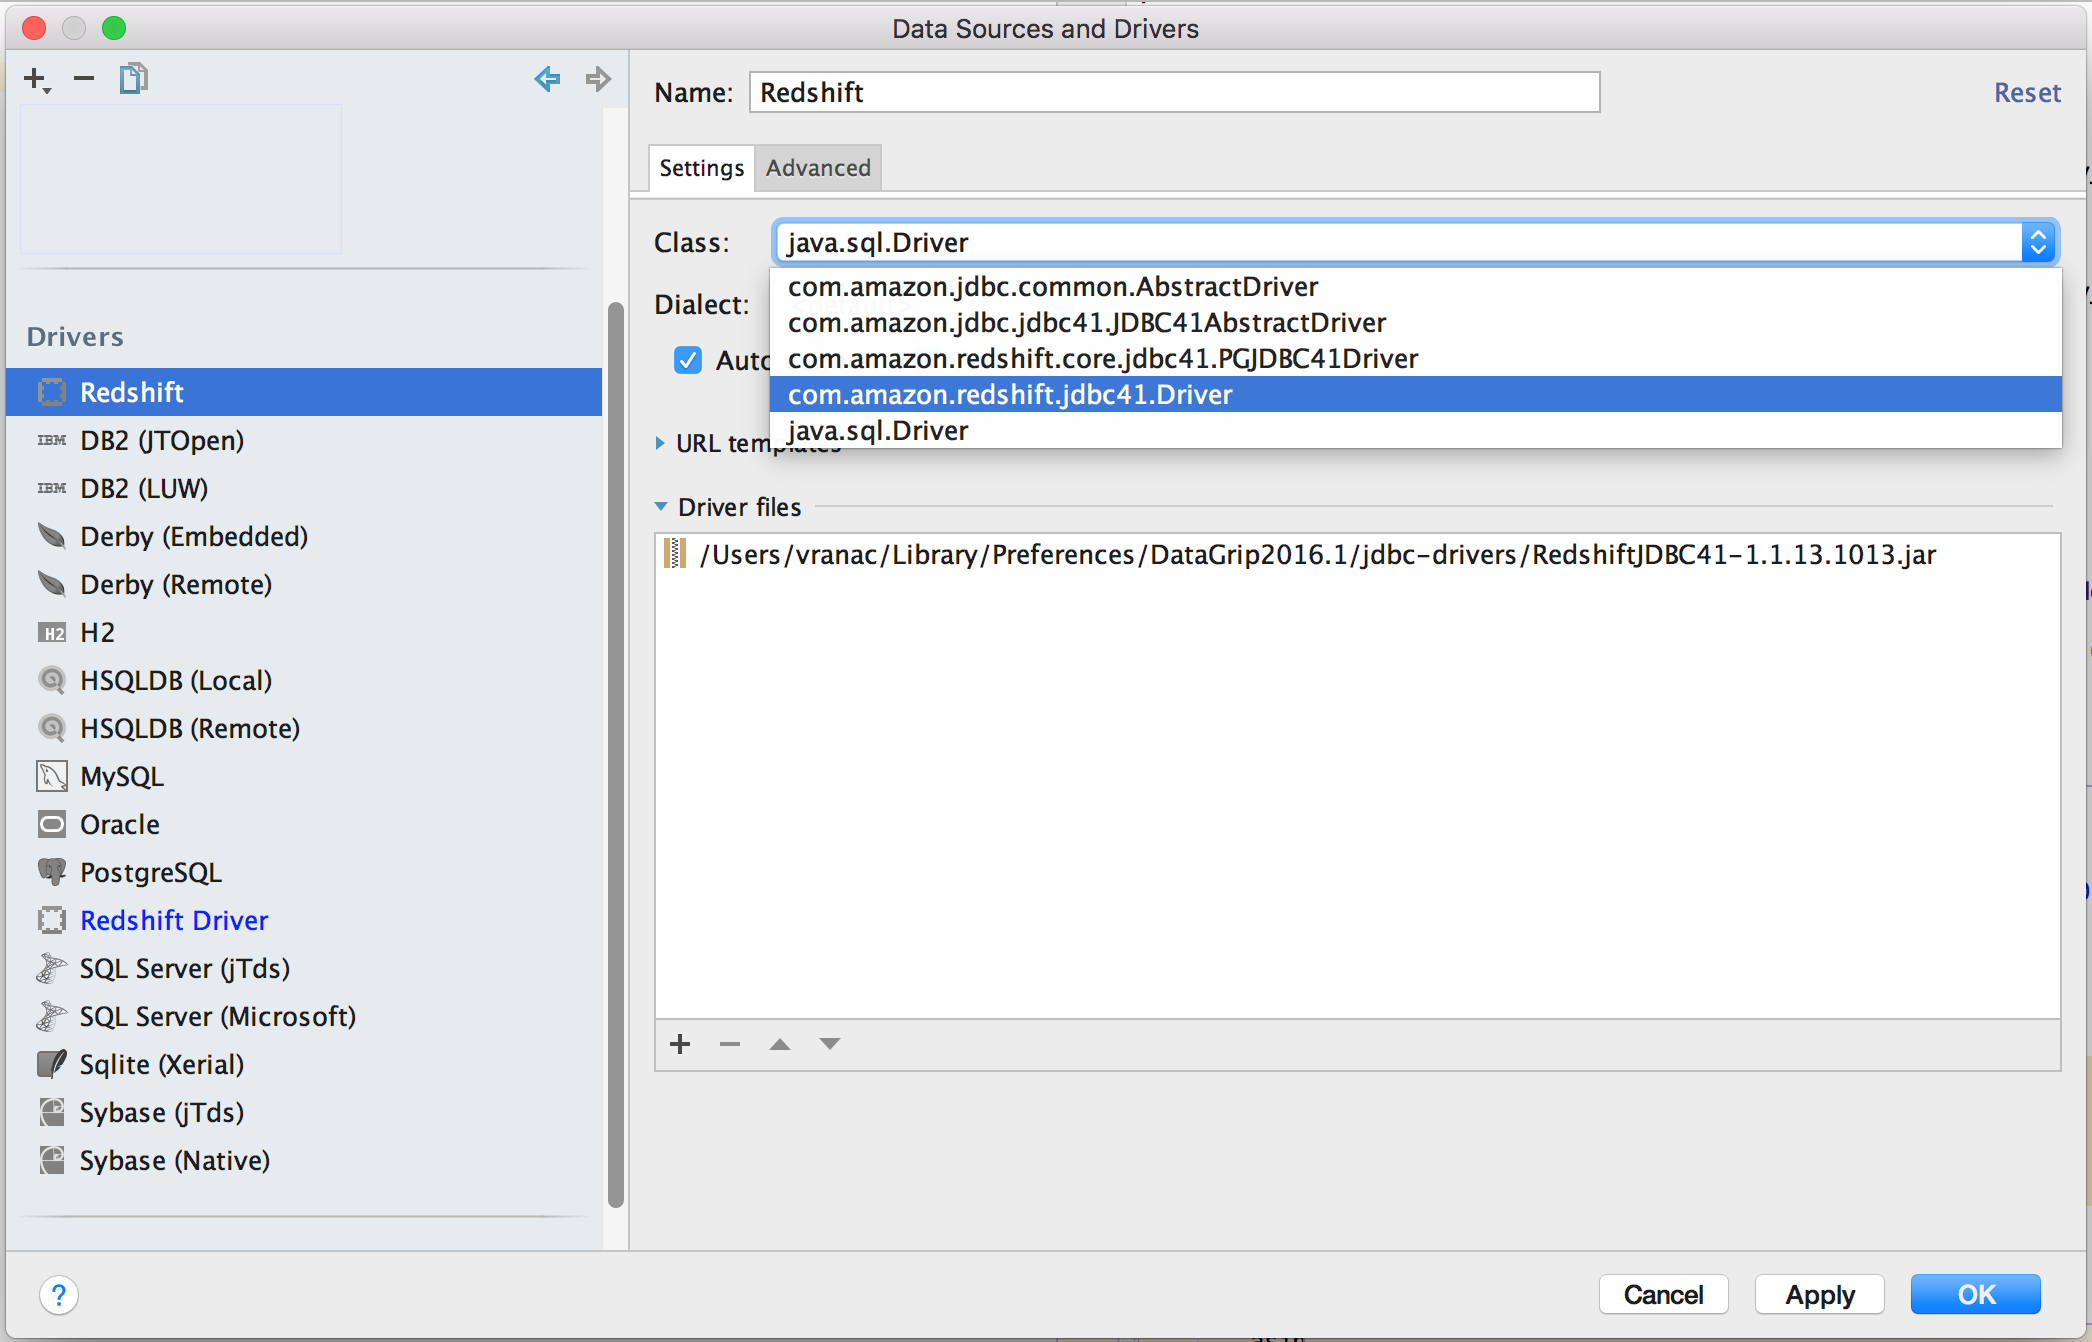
Once you have that sorted out, set the class that is to be used as main entry point
of the driver, in our case com.amazon.redshift.jdbc41.Driver.
[ ]
(/images/2016-05-14-connect-datagrip-to-redshift/select-class.png)
]
(/images/2016-05-14-connect-datagrip-to-redshift/select-class.png)
Select the dialect to PostgreSQL
[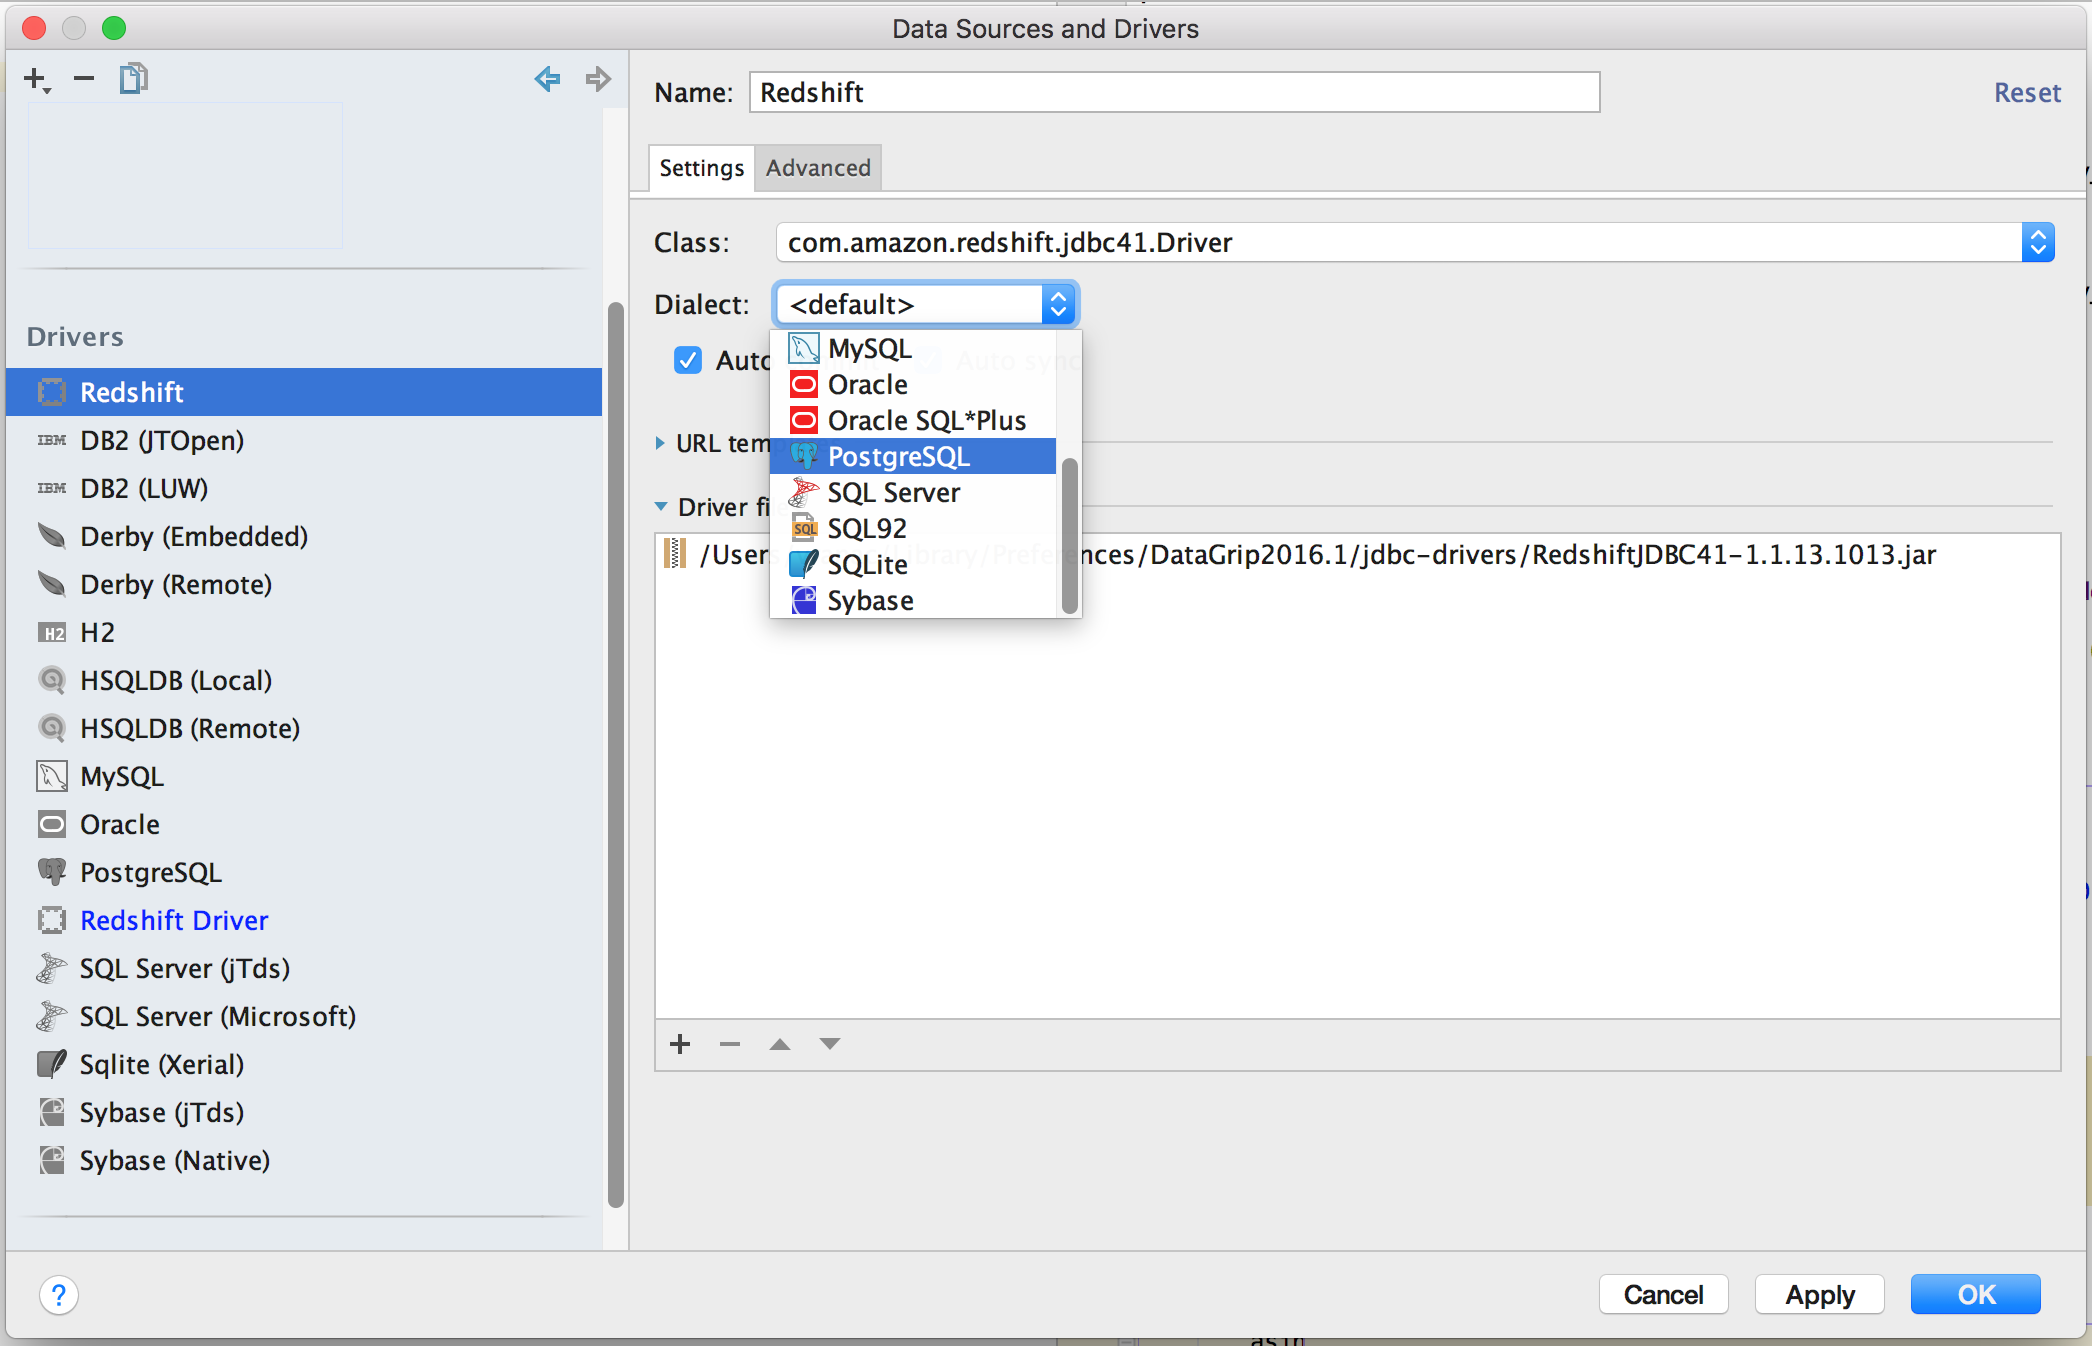 ]
(/images/2016-05-14-connect-datagrip-to-redshift/select-dialect.png)
]
(/images/2016-05-14-connect-datagrip-to-redshift/select-dialect.png)
And deselect Auto Commit, which requires you to explicitly commit after executing DML,
handy for not shooting yourself in the foot, YMMV.
[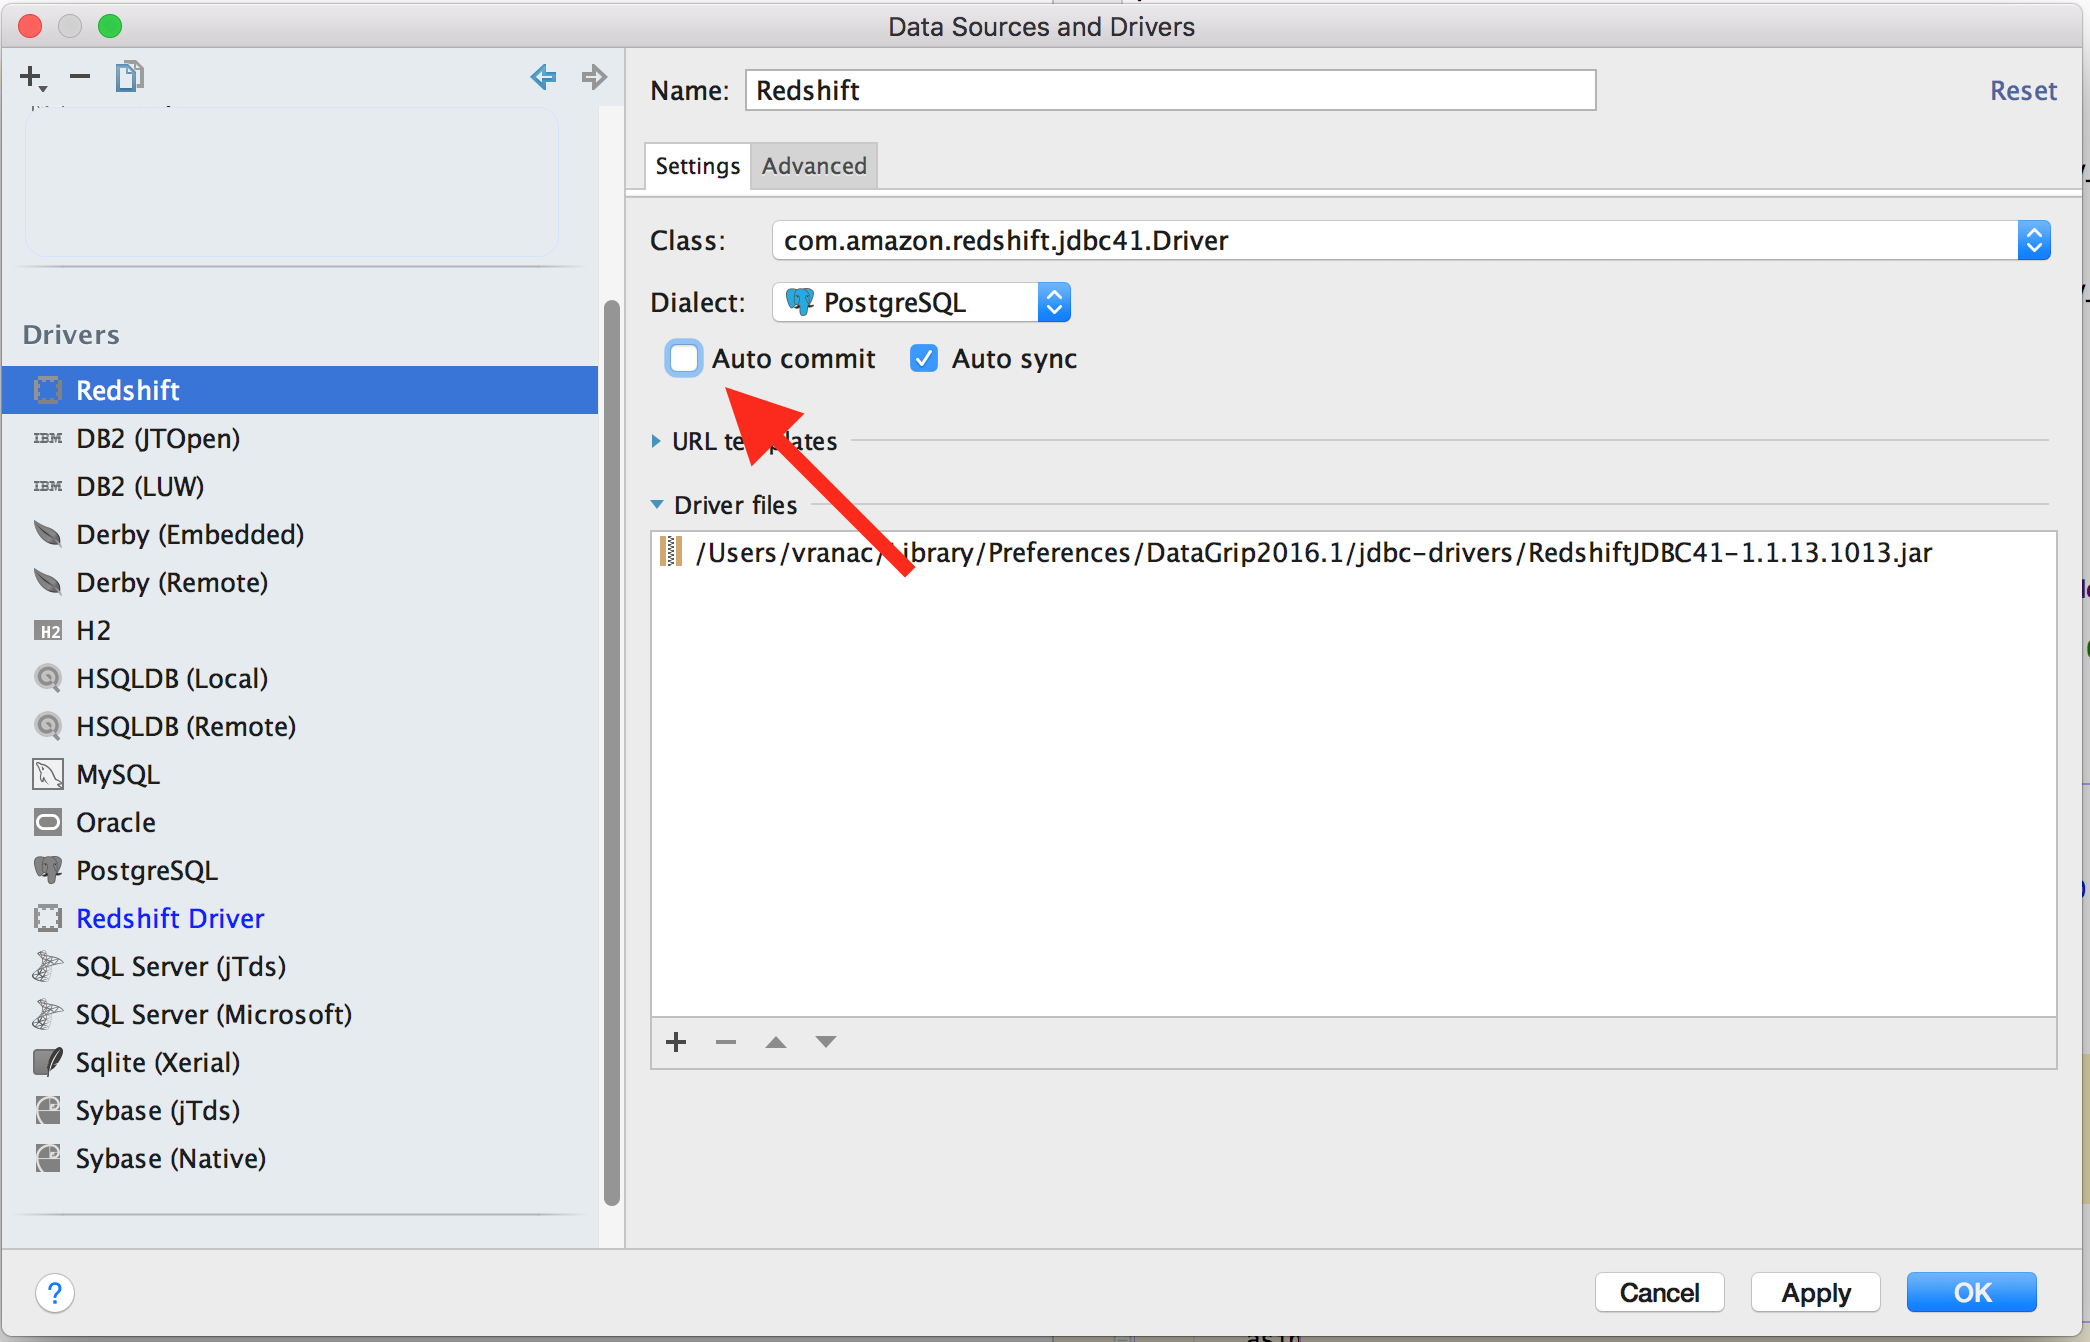 ]
(/images/2016-05-14-connect-datagrip-to-redshift/deselect-auto-commit.png)
]
(/images/2016-05-14-connect-datagrip-to-redshift/deselect-auto-commit.png)
And finally click OK, now you have a Redshift driver available to connect to the Redshift.
You now need to do is go to your Redshift Dashboard, select Clusters from the side menu, select the cluster you want to connect to by clicking on its name, and copying the JDBC URL listed under Cluster Database Properties.
Once you have the JDBC URL, click on the “+” sign you used to add the Redshift driver, and select the newly added driver
[ ]
(/images/2016-05-14-connect-datagrip-to-redshift/create-redshift-connection.png)
]
(/images/2016-05-14-connect-datagrip-to-redshift/create-redshift-connection.png)
Now paste your JDBC url into the url field, set your username and password.
[ ]
(/images/2016-05-14-connect-datagrip-to-redshift/edit-redshift-connection.png)
]
(/images/2016-05-14-connect-datagrip-to-redshift/edit-redshift-connection.png)
Once you click on the OK button you will be connected to your Redshift cluster.